Create a load balancer in the Cloudflare dashboard
Overview
This walkthrough uses the Load Balancing interface in the Traffic app of the Cloudflare dashboard to create a load balancer in active-passive failover configuration.
An active-passive failover configuration sends traffic to the servers in your active pool until a failure threshold (configurable) is reached. At the point of failure, Cloudflare then redirects traffic to the passive pool.
In the event that all pools are marked down, Cloudflare uses the fallback pool, which is the option of last resort for successfully sending traffic to an origin. Since the fallback pool is a last resort, its health is not taken into account, and Cloudflare reports its status as 'No Health'. You can nominate the fallback pool via the API or in the Cloudflare dashboard. For more on working with fallback pools, see Traffic steering.
Prerequisites
- Access to Load Balancing: Load Balancing requires one of the following:
- A Cloudflare Enterprise plan with Load Balancing enabled.
- An existing Free, Pro, or Business plan with a Load Balancing subscription.
- Load balancer hostname: The hostname for which the Cloudflare Load Balancer will manage traffic. The default hostname is the root hostname.
- Origin servers (2): This walkthrough requires at least two origin servers (origin-server-1 and origin-server-2, for example).
- Location: This walkthrough configures only a single geographic region.
Workflow
When creating a load balancer in the Cloudflare dashboard, follow this workflow:
Create a load balancer
To start, create a load balancer using the Create a Load Balancer wizard in the Cloudflare Traffic app:
Log in to your Cloudflare Account Home and click site for which you want to create a load balancer.
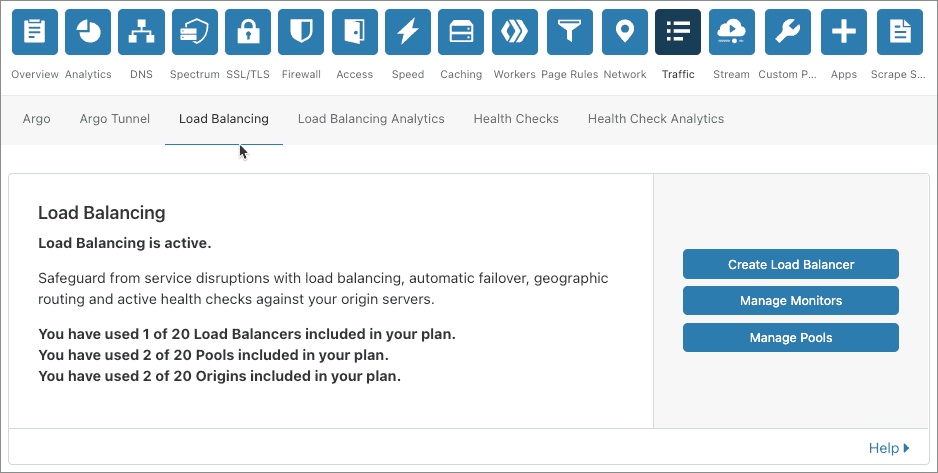
Open the Traffic app. If you see the Enable Load Balancing action instead of Create a Load Balancer, you need to add the Load Balancing service to your customer plan before you can proceed.
Click Create a Load Balancer.
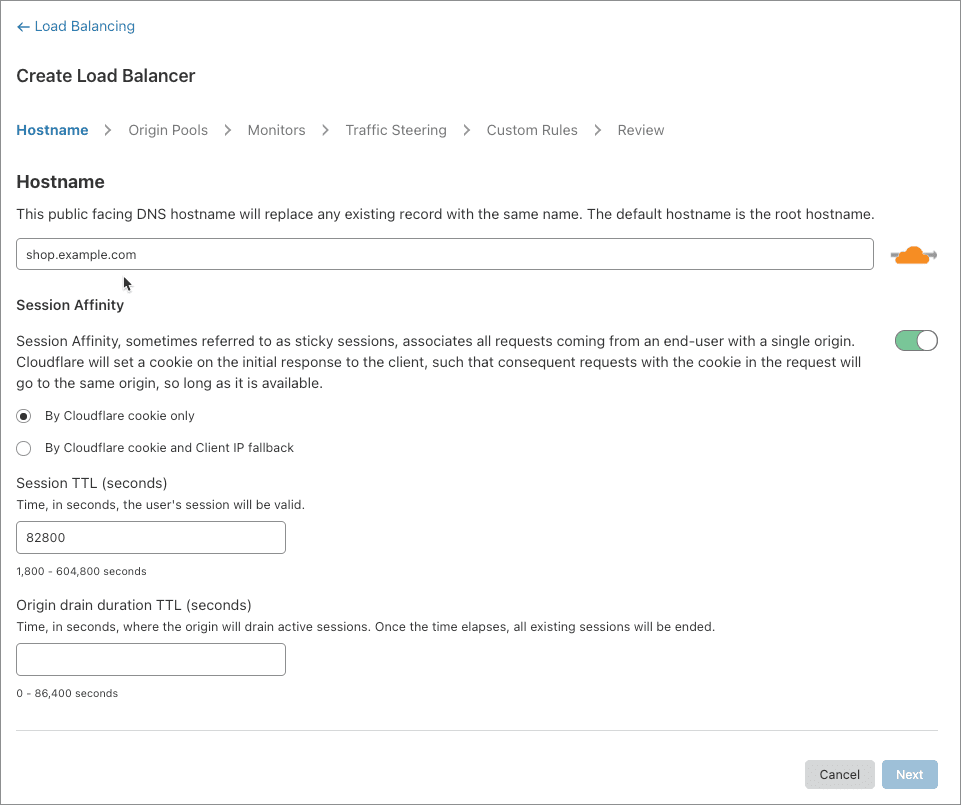
In the Hostname page, enter the hostname for your load balancer—the DNS name at which the load balancer is available.
To enable session affinity, select the By Cloudflare cookie only radio button and toggle the Session Affinity switch.
Click Next to continue.
You are now ready to create and add origin pools to your load balancer.
Create and add origin pools
This example creates two origin pools—the primary pool and a secondary, backup pool that serves traffic when the primary fails. (To set up an active-active failover configuration, where all servers receive traffic at once, create only a single pool.)
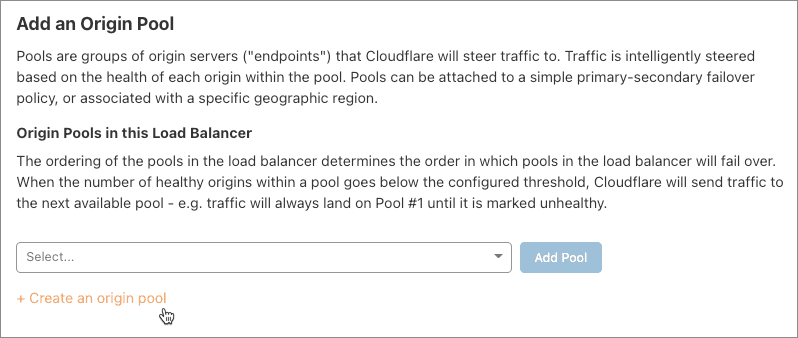
In the Add an Origin Pool page, click Create an origin pool.
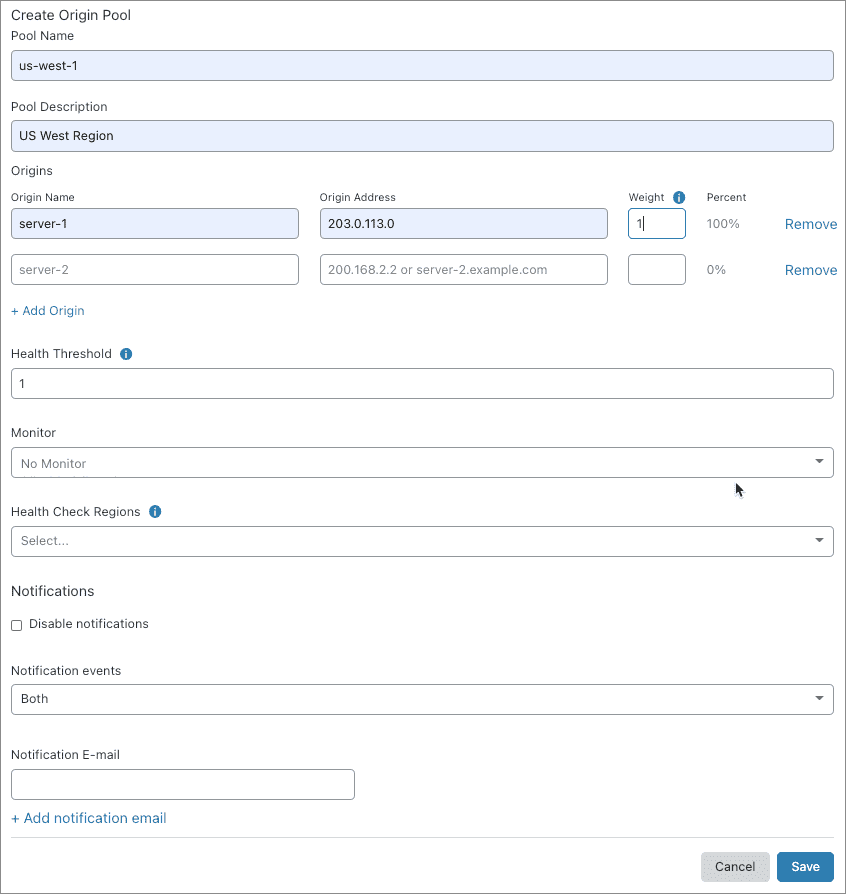
Enter a name and origin server address for the first pool (this must be unique). When the origin server has a hostname, you can enter that as well. To add existing origins, click Add Origin.
You must also enter a Weight for your origin. The weight of the origin (0.01–1.00) is relative to other origins in the same pool, so an origin with a weight of 1 will receive twice as much traffic as one with a weight of 0.5. A weight of 0 means traffic will not be sent to this origin, but health is still checked.
Leave the heath and notification settings at their defaults for now and click Save.
Add a second pool, similar to first, repeating the previous steps, and click Save.
The list of pools displays. By default, pools are ordered by date created. You can reorder them by clicking the arrows next to the numerals in the Order column:
For now, leave the order as it is.
Click Next to continue.
You are now ready to configure health checks for your load balancer.
Create, attach, and configure monitors
Create monitors to run health checks that track the status of your origin servers.
Create a monitor to attach to an origin pool
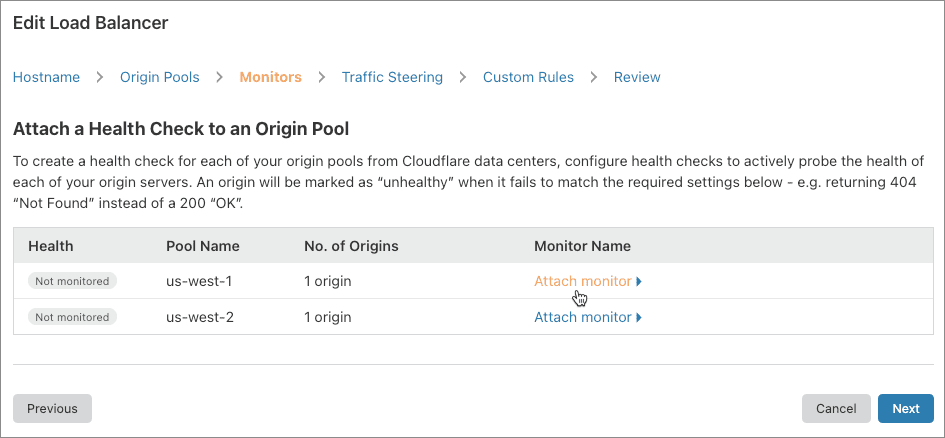
Select the pool to which you want to configure health checks, and click Attach monitor.
The Add Monitor and Create a Monitor controls display.
Click Create a Monitor.
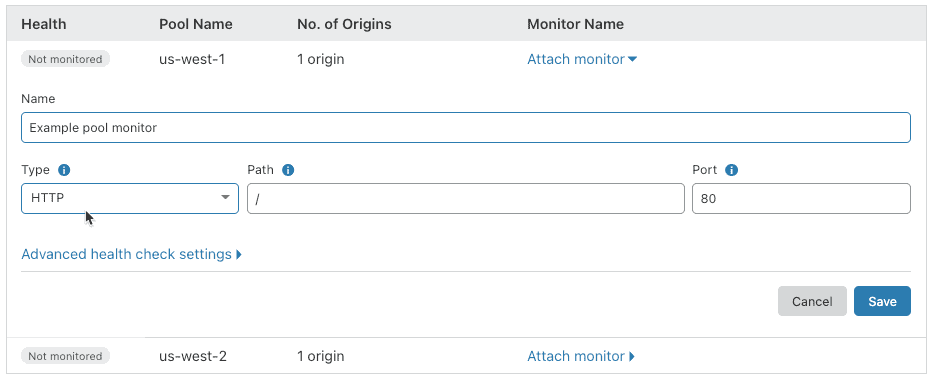
Supply an informative name for your monitor in the Name input.
Supply settings for each of the following:
Type: The protocol to use for health checks. Click the drop-down list and choose HTTP, HTTPS, or TCP.
Path: The endpoint path to run health checks against.
Port: The destination port for health checks.
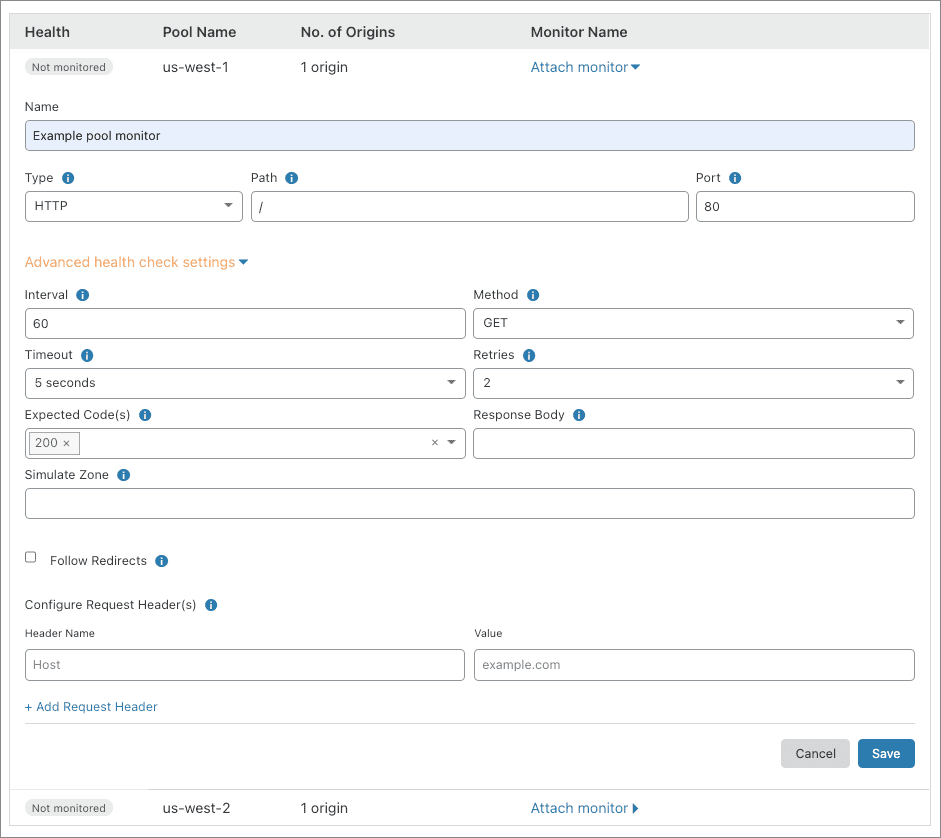
[Optional] For additional settings, click Advanced health check settings:
Click Save.
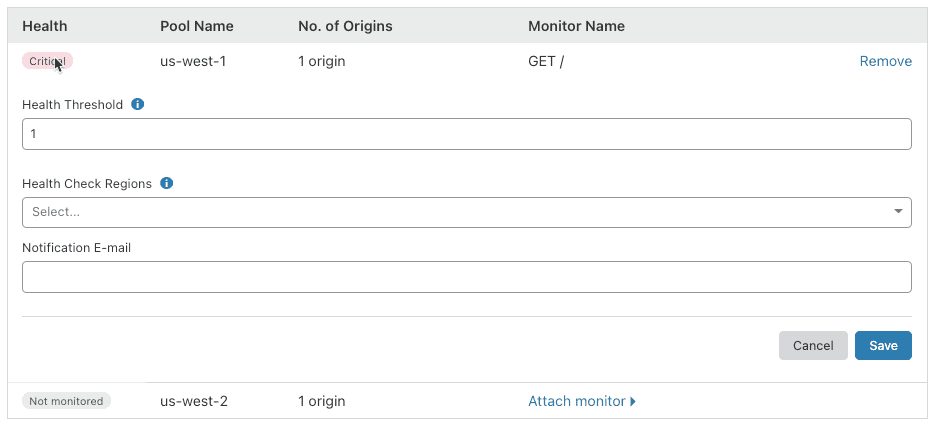
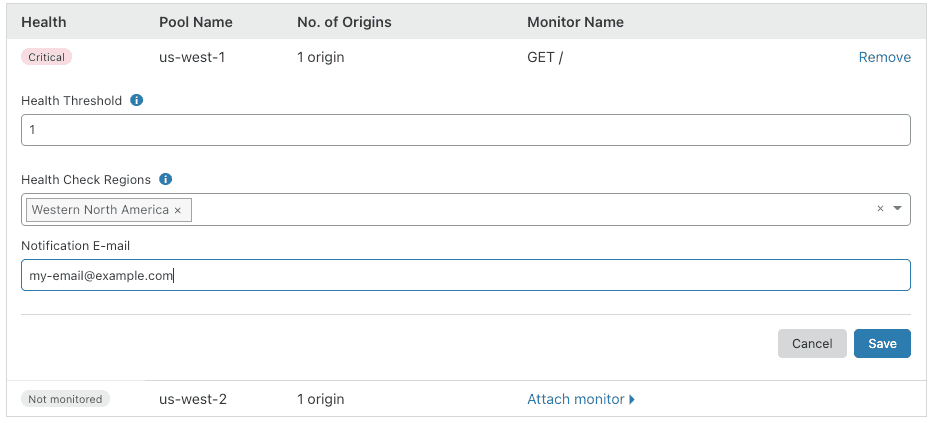
The Configure Monitor page displays:
Configure the monitor
To configure the monitor, supply these values:
Health Threshold: Defines the number of healthy origin servers required to consider the pool healthy. When the number of healthy origin servers drops below the threshold, the pool will be marked unhealthy. There is only one origin server in this pool, so leave this value at 1.
Health Check Regions: Specify geographic regions from which Cloudflare should send health check requests. To select a region, use the drop-down list.
Notification E-mail: Enter an email address to receive notifications in the Notifications E-mail field. You can use a mailing list address or a PagerDuty address to share the notifications with a group.
To save your monitor and attach it to your pool, click Save.
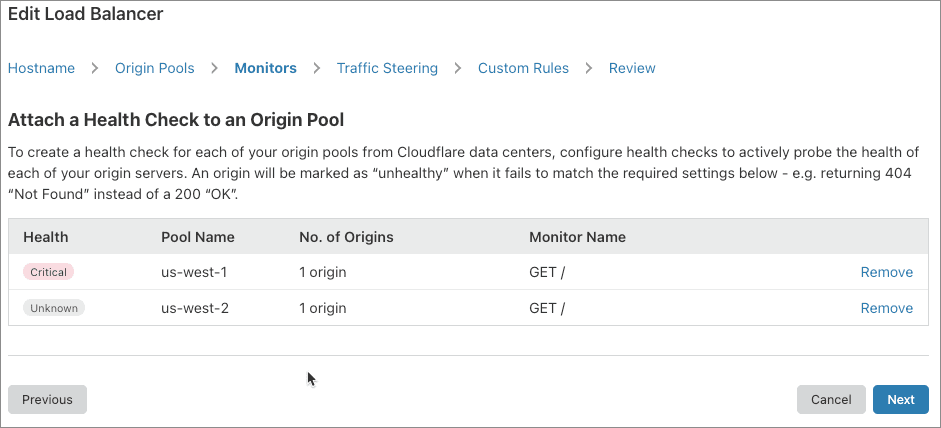
The configuration page closes and your monitor is displayed in the pools list:
The status of your health check will be unknown until the results of the first check are available.
Attach a monitor to your secondary pool
To attach a monitor to your secondary pool, repeat the steps in Create a monitor to attach to an origin pool and Configure the monitorl:
Now that you have set up health checks for your load balancer, click Next to continue and configure Traffic Steering.
Configure Traffic Steering
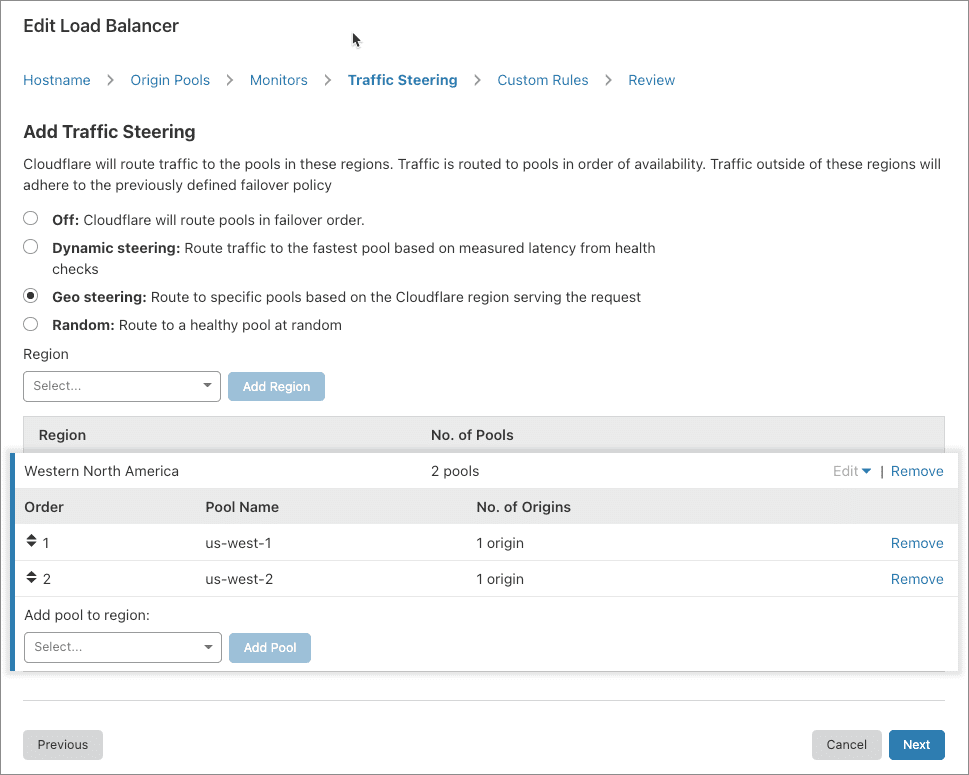
Use Geo Routing to configure traffic policies and failover priority by geographic region. This is extremely useful when you want site visitors to access the origin server closest to them, which improves page-loading performance.
For this exercise, don’t add new regions. For more on Geo Routing, see Traffic steering.
Click Next to continue and create custom Load Balancing rules.
Create custom Load Balancing rules
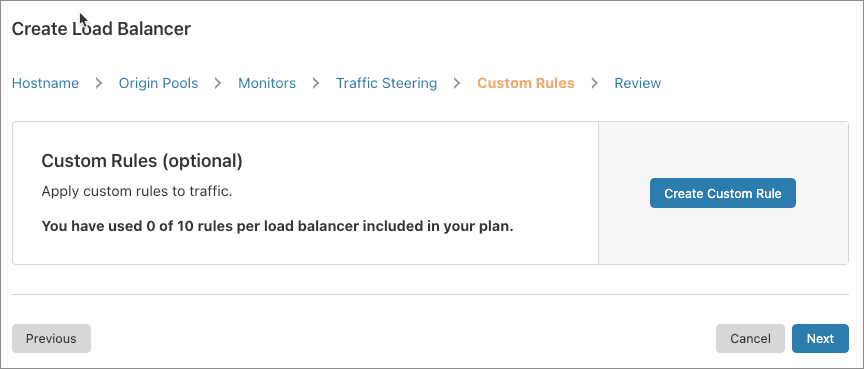
Load Balancing rules allow you to customize the behavior of your Cloudflare load balancer. For example, use Load Balancing rules to select an origin pool based on the URI path of an HTTP request.
For a walkthrough, see Creating Load Balancing rules.
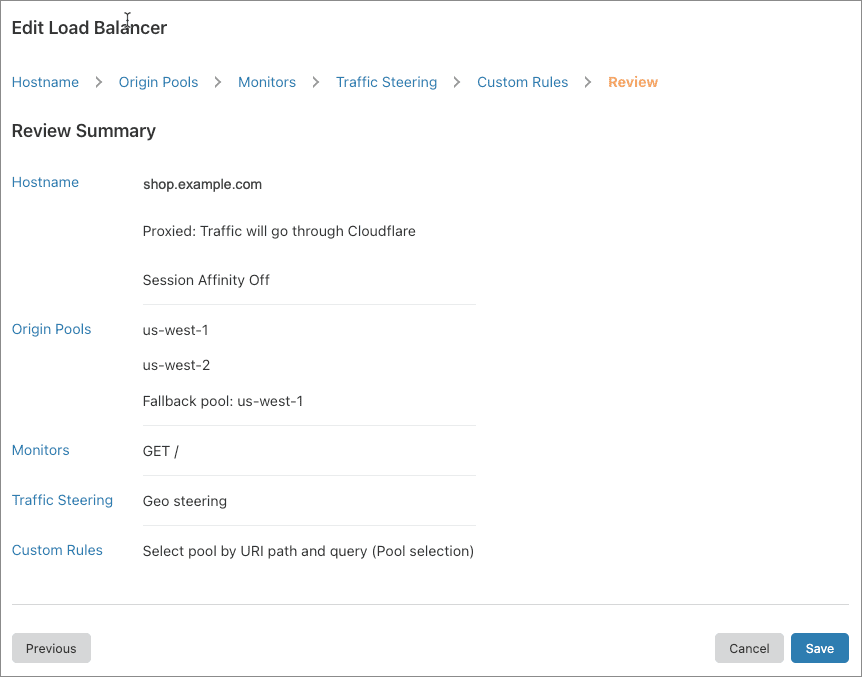
Review your load balancer configuration
Before creating your load balancer, the creation wizard presents your a summary of your configuration so that you can review and make changes.
Once you approve the configuration, click Save and Deploy to commit the configuration and immediately start your load balancer. Clicking Save as Draft will commit your configuration without starting the load balancer.
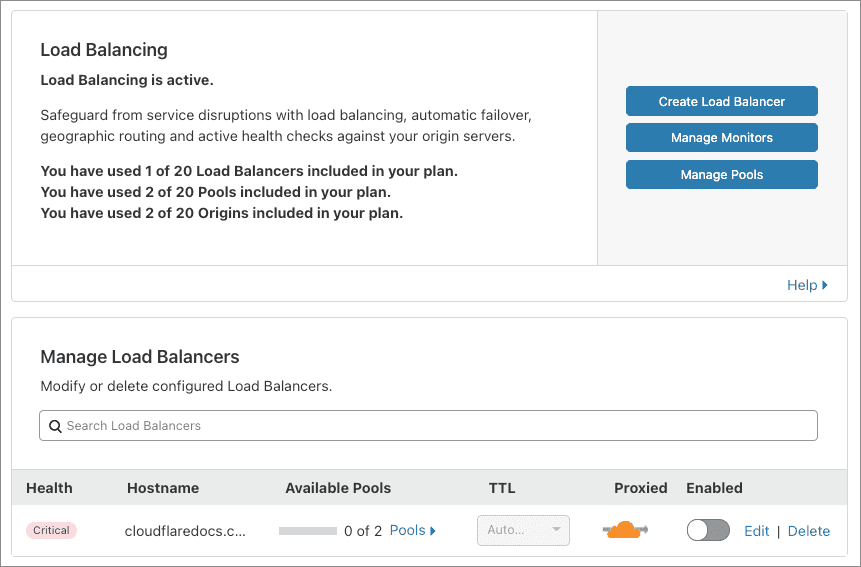
Once you have saved your load balancer configuration, you will be returned to the Load Balancing card. The card provides quick access to common actions.
You can monitor your load balancers on the Manage Load Balancers card.
Share your load balancer with other sites
You can share your load balancer with other sites in your account by creating a canonical name (CNAME) record in the Cloudflare DNS app. This is useful for sharing configurations with multiple other domains, and you do not have to create new load balancers for each site.
For more, see Configuring a CNAME setup in the Cloudflare Support knowledge base.
You can also configure separate load balancers for each domain and reuse monitors and pools. This is especially useful for changing the failover order for different domains, such as when your example.co.uk server has a different failover priority from example.com or example.com.au.
