Best practices
Planned maintenance
When making changes to your applications or adding assets, you may want to roll out those changes one origin at a time to ensure they work properly. However, as the load balancer continues to direct traffic among multiple origins, both versions of your app are served and the user has an inconsistent experience.
To avoid an inconsistent user experience when rolling out application changes, you can temporarily configure load balancing not to direct traffic to each origin as you upgrade them.
Using the Load Balancing dashboard to temporarily ignore an origin server
To temporarily ignore an origin server:
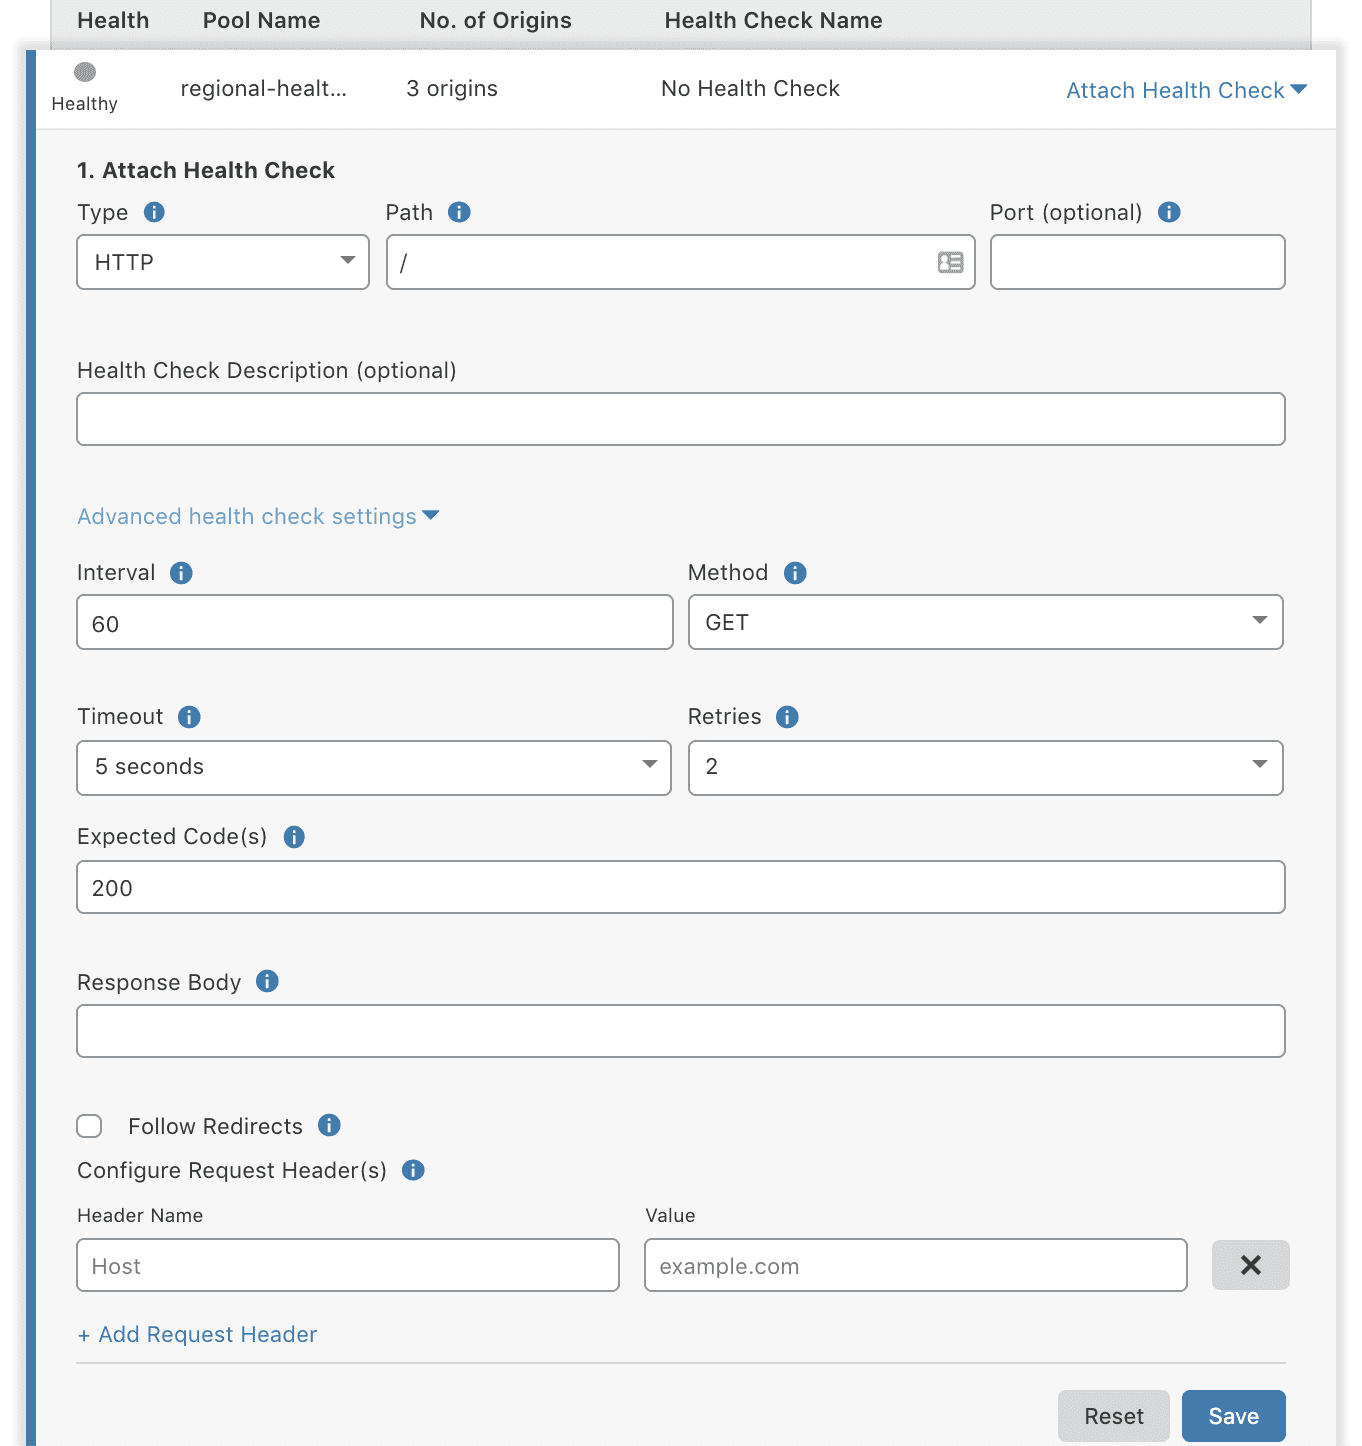
Deliberately configure a monitor so that your origin will fail health checks and Cloudflare will consider the origin server unhealthy and route traffic away from it. For example, set the Response Code to an HTTP status code you know your server does not return. Alternatively, you could set a value for Response Body that will not match. For example, you can configure the Response Body in a monitor to look for specific text.
Confirm the origin server is not receiving traffic. Load Balancing will issue a notification email that the origin is down.
Upgrade the origin and test that the change is working as you intended.
Reenable load balancing for the upgraded origin server by restoring the values you modified in Step 1 to those expected for a healthy origin.
Repeat these steps for the other origins across which you are balancing application traffic.
This process lets you make controlled changes to your origin servers without disrupting users.
Using the Cloudflare API to temporarily set origin status to disabled
You can automate this process with the Load Balancing Cloudflare API by setting the status of an origin server to “disabled” so that Load Balancing does not route traffic to the origin while you are upgrading it.
To temporarily set origin status to disabled, use the Update Load Balancer command to set the enabled property for that origin object to false, as in the example below:
// PUT https://api.cloudflare.com/client/v4/user/load_balancers/pools/<pool_id>{ "description": "Production Datacenter #1 - US West ", "created_on": "2016-12-22T16:16:16.206253Z", "modified_on": "2017-01-14T00:11:23.656655Z", "id": "916167df7265e0ab2284400cee32282f", "enabled": true, "minimum_origins": 1, "monitor": null, "name": "Production Datacenter 1", "notification_email": "you@example.com", "origins": [ { "name": "server-1", "address": "0.0.1.1", "enabled": false }, { "name": "server-2", "address": "0.0.2.2", "enabled": true } ]}Load balancing containerized application deployments
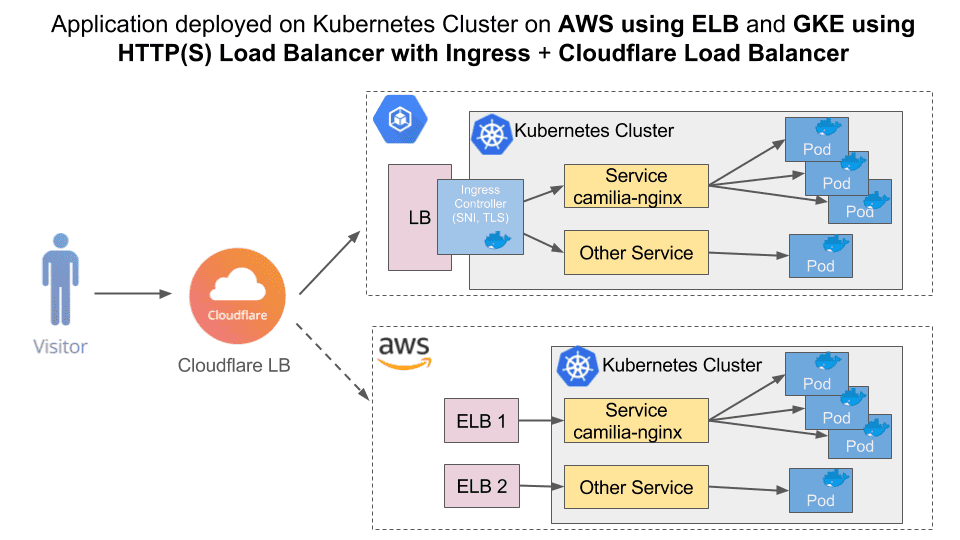
Cloudflare’s Load Balancer distributes global traffic intelligently across Google Kubernetes Engine (GKE) and Amazon Web Services EC2 (AWS). Cloudflare’s native Kubernetes support provides a multi-cloud deployment that is transparent to end users.
Prerequisites
Before you begin, be sure you have the following:
- Access to Google Cloud Platform (GCP)
- Access to AWS
- Docker image
- A domain on Cloudflare (on the Free, Pro, or Business plan) with a Load Balancing subscription, configurable in the Traffic app
Deploying a containerized web application on Google Kubernetes Engine
We will be using Google Cloud Shell interface, which comes preinstalled with the gcloud console, docker, and kubectl command-line tools used below. If you use Cloud Shell, you don’t need to install these command-line tools on your workstation.
Getting started
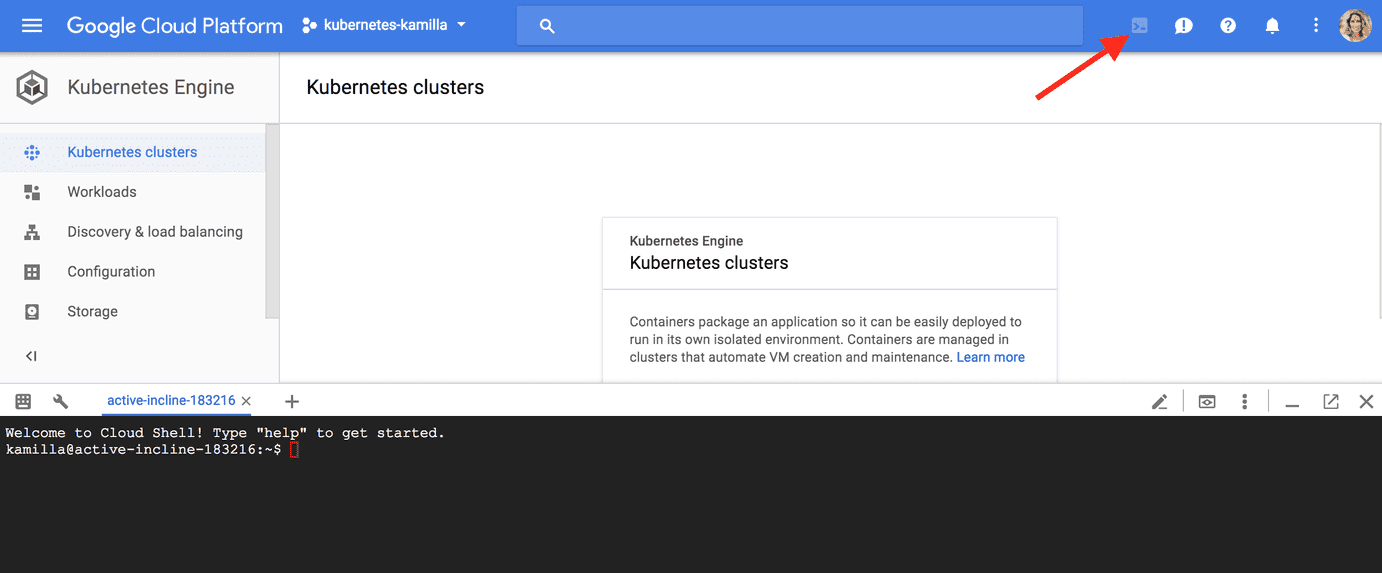
Go to the Kubernetes Engine. Click the Activate Google Cloud Shell button at the top of the console window. A Cloud Shell session with a command prompt will open in a new frame at the bottom of the console.
Set default configuration values by running the following commands:
gcloud config set project PROJECT_IDgcloud config set compute/zone us-west1-a
Deploying a web application
Create a container cluster to run the container image. A cluster consists of a pool of Compute Engine VM instances running Kubernetes.
Run the following command to create a three-node cluster (our cluster name is camilia-cluster):
gcloud container clusters create camilia-cluster --num-nodes=3It may take several minutes for the cluster to be created. Once the command is complete, run the following command to see the cluster’s three worker VM instances:
gcloud compute instances list
Deploy the application to the cluster. Use the kubectl command-line tool to deploy and manage applications on a Kubernetes Engine cluster. You can create a simple nginx docker container, for example, using the following command (camilia-nginx is the name for the deployment):
kubectl run camilia-nginx --image=nginx --port 80


